Shiny Stone

The Shiny Stone is an Expert Mode accessory that increases the rate of health regeneration slowly over time when the player is not moving or using any tools or weapons. The Shiny Stone is found in the Treasure Bag dropped by the Golem in Expert Mode.

The health regeneration slowly increases from roughly 10 health gained per second to roughly 40 health gained per second (for players with enough health capacity to recover for that long). A yellow particle effect over the player signifies that the boost is engaged, which also emits a good deal of light from the player onto the surrounding area.

  • Taking damage, using most items, moving or Bleeding will all reset the health regeneration’s acceleration. Using a Fishing Poleor Health Potions will not.
  • If player is moving in a very low speed, it can still take effect.
  • If player is using items while not moving, it will still give a 2 HP/s healing rate as well as reduce the effect of Expert mode and Feral Bite.
  • Health regeneration is still possible if the player is sitting still while riding a mount or minecart, or while grappled.
  • If you have a debuff, like On Fire!, but except Poisoned, the Shiny Stone will reduce or stop the damage gained from the debuff instead of healing you.
  • If player has a positive healing rate, it will give an additional 0.5 HP/s healing effect.
  • See Health Regeneration page for more details about its mechanism.

Sharkron Balloon

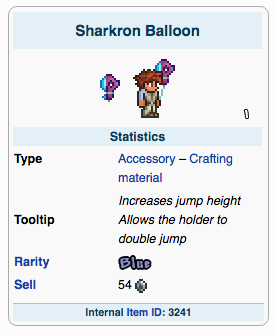
The Sharkron Balloon is an accessory. It combines the functionality of the Tsunami in a Bottle and the Balloon Pufferfish. It is especially effective when combined with wings, because the cloud will jump-start your wings and the Pufferfish will let you fly higher. The Sharkron Balloon’s double jump travels further than the Cloud in a Balloon by four blocks. However, the Blizzard in a Balloon travels further than the Sharkron Balloon by five blocks.

It can be crafted together with a Lucky Horseshoe to craft a Pink Horseshoe Balloon.

Sharktooth Necklace

The Shark Tooth Necklace is an accessory which has a 0.67% / 1.33% (1/146 / 1/77) chance to drop from Blood Zombies and Dripplers found during a Blood Moon. It causes the player’s attacks to ignore some of their target’s defense, by lowering their armor by 5. In normal mode, this can increase the effective damage of the player’s attacks 2 or 3 HP, depending on the enemy’s defense before this is factored in.


  • This item is very useful in pre-Hardmode and early Hardmode because it has a fixed armor penetration value.
  • The Shark Tooth Necklace is great for overcoming the shortcomings of early high rate, low damage weapons such as the Minishark and the Bee Gun, which fall short when fighting high defense enemies.
  • The Shark Tooth Necklace is also very effective against expert mode bosses which have heightened defense, such as Skeletron in pre-Hardmode, especially since defense is more relevant in expert mode.

Seedler

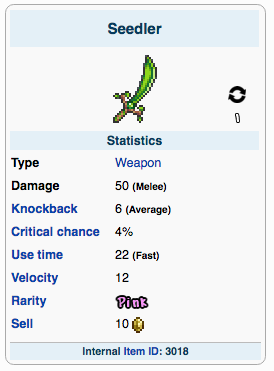
The Seedler is a Hardmode sword that has a 14.29% chance to be dropped by Plantera. It fires out grenade-like projectiles, which explode after a period of time (0.5-1 second) or when hitting an enemy, sending out multiple, smaller and faster shards.

Its best Modifier is Legendary.


  • The Seedler was unobtainable in Expert Mode, as it couldn’t be obtainable from Plantera’s Treasure Bag until the 1.3.0.5 update.
  • The player is able to turn while swinging, as you swing in the direction of the mouse.
  • The Seedler could be considered as the Hardmode upgrade of the Blade of Grass, as it can be obtained from sources in the Jungle, it has a much better (by 7) swing speed, and it looks quite similar.
  • The sword itself, much like the Blade of Grass, does not emit any light itself, but its projectiles do, on detonation.
  • Melee effects, such as those given by the Magma Stone and Frost armor, are also applied to all projectiles but was fixed in the 1.3.0.5 update.
  • Unlike the Terra Blade’s projectile, melee speed modifiers do not increase the number of seeds thrown.
  • Each seed appears to fire 6 projectiles upon exploding, these projectiles do not pierce enemies. Worth noting is, the projectiles seem to prioritize going after enemies, often resulting hitting one enemy with 3+ projectiles, doing massive damage, one-shotting low health mobs. This, combined with it’s low use time makes it a very useful weapon, as the player isn’t required to aim straight at the enemy targeted.
  • The large projectile arcs downwards rather quickly, however the smaller shards are unaffected by gravity
  • Attacking large segmented enemies such as The Destroyer can do immense amounts of damage due to the exploding projectiles.It is also extremely effective for clearing out caves while taking next to no damage, as the seeds can be lobbed into a room, quickly clearing out mobs.The seeds also prove very useful while fighting large numbers of enemies (perhaps during Events like Solar Eclipse)Try to launch the initial projectile so that it explodes at a distance from any surface, otherwise the shards will hit the blocks, significantly reducing the weapons’ damage potential.

Sailfish Boots

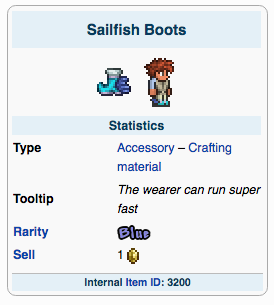
Sailfish Boots are boots that allow the user to run super fast. You can get this item from Wooden Crates and Iron Crates. When the user is running fast they get water particles coming out of their backs. After a build-up, the user can run up to a maximum speed of 31 mph without other movement accessories. Hermes Boots, Sailfish Boots and Flurry Boots are functionally identical.

Red’s Throw

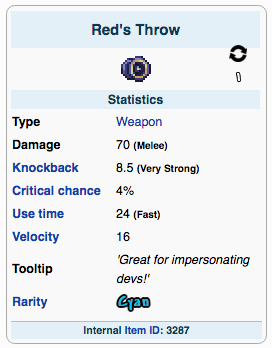
Red’s Throw is a Hardmode, Expert Mode exclusive yoyo. It is obtainable from any Hardmode bosses Treasure Bag as part of Red’s Armor equipment set. Like certain other yoyos, Red’s Throw can be held in the air indefinitely.

Its best Modifier is Godly.

Rally

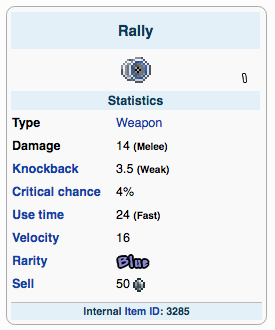
The Rally is an early-game yoyo that is dropped by Giant Shellies, Crawdads, and Salamanders in the Cavern layer or lower, with a drop chance of about 3.9%. It will remain deployed for about five seconds before returning automatically to the player.

Its best Modifier is Godly.

Rainbow Crystal Staff

The Rainbow Crystal Staff is a Hardmode, post-Moon Lord summon weapon. It summons a sentry-style minion that lasts for two minutes, remains stationary, and does not count against the player’s minion capacity. The Rainbow Crystal Staff has a 1/9 chance (11.11%) to be dropped by the Moon Lord boss.

The Rainbow Crystal Staff summons a temporary crystal that deals high damage to enemies within its 60-tile range. Unlike other sentry summons, the crystal floats in midair at the cursor position when summoned, rather than falling to the ground. Attacks are animated as a spread of colored light beams targeting the closest enemy. The beams themselves do not do damage; damage is dealt only by delayed explosions at the end of the beams.

Its best Modifier is Ruthless. The Mythical modifier provides the widest array of stats bonuses, but these primarily affect the initial summon rather than the resulting minion. Additionally, minions cannot deal critical hits. The only noticeable advantage a Mythical Rainbow Crystal Staff has over a Ruthless one is knockback.

  • The crystal may sporadically attack through blocks, though this does not occur often.
  • The light beams from the crystal will detect enemies that haven’t appeared on-screen yet. This is useful for detecting which direction new enemies will appear from.
  • The Rainbow Crystal Staff can be used simultaneously with other sentry minions without impacting the player’s normal minion total.
  • Its high damage and wide coverage is offset by the delayed explosions. Fast mobs will easily evade the damage. Limiting mob movement is recommended to bring out the weapon’s true potential.The Stardust Guardian proves very useful in keeping enemies in a single spot so they are hit by the delayed explosions, as it both attempts to aggro the enemies onto itself, and pulls them towards it with each attack.This weapon has massive range, being able to shoot mobs from off-screen. It only does so when there are no hostile mobs closer to it. An effective use of this weapon is to place it high in the air where it can target more enemies.It is also recommended to use this weapon in situations in which mobs will clump together (i.e. the Lunar Event) as its multiple beams will target the whole group and deal massive damage.

Psycho Knife

The Psycho Knife is a Hardmode, post-Plantera melee weapon that has a 2.5% / 3.75% (1/40 / 3/80) chance to be dropped by the Psycho during the Solar Eclipse event. When holding the Psycho Knife and standing still, the player will quickly enter stealth mode, causing them to turn almost completely transparent, move much slower, and no longer be targeted by enemies.

Stealth mode is engaged gradually over the course of about one second, during which the weapon’s stats are steadily boosted up to the following values:

  • Damage +300%: 280 (from 70)
  • Critical chance +30: 34% (from 4%)
  • Knockback +100%: 7 “Strong” (from 3.5 “Weak”)

Stealth mode is disengaged when successfully attacking an enemy or when switching to a different weapon. Swinging the weapon alone does not cancel stealth, nor does walking or flying. Standing still again afterward re-engages it. Moving or swinging the weapon during the one-second transition period, however, will cancel stealth mode.

Its best Modifier is Legendary.

  • The stealth mode that is activated by the Psycho Knife is similar to that of the special ability of Shroomite armor.
  • Mount speed is unaffected by the stealth mode slowdown.
  • Wings’ vertical flight speed is not affected, but horizontal flight speed is slowed to the same rate as walking.
  • The dash from the Solar Flare armor and the Shield of Cthulhu also gain the stealth mode damage boost.
  • Other players can see a stealthed player who is using the Psycho Knife if they are missing health, as the health bar will be shown above their head.
  • Aggro-increasing accessories like the Flesh Knuckles or late game tank armor will still cause enemies to target the player, even in stealth mode.
  • All other melee weapons are affected by the increased stats from stealth mode, however if you attempt to switch weapons the stealth will disappear.
  • Melee weapon projectile stats from any weapon will be boosted during stealth, which is useful for large amounts of enemies.
  • Using Meowmere and switching to Psycho Knife before the projectile hits will result in extreme damage to enemies hit during stealth.

Portal Gun

The Portal Gun is a Hardmode, post-Moon Lord item. It is always dropped by the Moon Lord. It launches projectiles capable of creating up to two portals (one via LMB, the other via RMB) upon impact with blocks. These two portals are linked; any player that touches one will be instantly transported to the other one, without losing momentum.

While selected, the Portal Gun will alter the player’s physics: maximum fall speed * 3.5 (from 51MPH to 179MPH) and horizontal momentum/inertia is kept while in the air. This effect is also applied if the last entity that affected the player’s fall was a portal.


  • Portals can only be used to transport players and NPCs. Enemies and projectiles do not interact with portals in any way. The Skeleton Merchant cannot be teleported.
  • The Portal Gun has a range of 1400-1500 blocks.
  • Portals can face up or down, left or right, or diagonal in any direction.
  • If the player attempts to use the Portal Gun with an object, such as a chest, they will fire a second portal slightly before opening the chest, thus rendering them unable to move any items and ruining their portal placement at the same time.
  • Despite being a tool, the Portal Gun cannot be placed on a weapon rack.
  • In multiplayer, all players will have different portal colors.
  • The Portal Gun alone does not block fall damage, but traveling through a portal will reset fall damage taken.
  • Teleporting quickly shifts the viewpoint instead of instantly setting it to the destination point if the two portals are within viewable distance of each other.
  • Portals close if the player gets around 1600 feet away from them, dies, or leaves the world.
  • A mounted player cannot travel through a portal.
  • The increased fall speed does not work while riding a mount.
  • The effects of touching a block will occur before the player enters a portal. A portal placed on damaging blocks will harm the player, and one placed on Pink Slime Blocks will cause a player to bounce, slowing their fall speed.
  • If a player were to use the portal gun at the top of their world they can use the incredible falling speed combined with decent wings to remain at a stable altitude while keeping a horizontal speed of 179 mph. This can then be used to cross the map very quickly.
  • If a player shoots both portals at the same location, the portals have no effect and the player walks on the blocks as if the portals are not there.

Phantasm

The Phantasm is a Hardmode, post-Lunatic Cultist

bow that auto-fires 4 arrows at once, while only consuming a single arrow from the player’s inventory. Arrows are loosely grouped and can fire with varied velocities and ranges (similar to the Chlorophyte Shotbow).

In addition, each successful hit on an enemy causes an additional barrage of magical arrow projectiles to fire and home in on the target that was hit initially, with no additional ammo or mana cost. Holding down the attack button increases the fire rate slightly. The bow also has an overall 2/3 chance of not consuming ammunition.

Its best Modifier is Unreal.


  • If used against the Celestial Towers during the Lunar Event, the bow can destroy a single Tower within a few seconds.
  • Try not to use piercing arrows, as enemies will have a brief period of invulnerability and many arrows will pass through without causing damage.
  • Using Ichor Arrows reduces the defense of enemies you hit, increasing the damage from the extra shots as well as the extra barrage, increasing damage output significantly.
  • With the combined ammo reservation effects of the Vortex Breastplate, Chlorophyte Helmet, Ammo Reservation Potion, Ammo Box, and the Magic Quiver, it is possible to achieve an 89.5552% chance not to consume ammo. This is the highest possible chance as of 1.3.0.8.
  • The Phantasm can still be fired while under the effects of the Stoned debuff, if the attack button was held from before the debuff was inflicted.
  • Before having been fixed and nerfed within the last few patches, the Phantasm was exceptionally powerful.

PDA

The PDA is an informational accessory that displays fishing information, weather, moon phase, elevation, distance east/west, time, nearest valuable treasure, player speed, current DPS, number of monsters killed, rare nearby creatures, and nearby enemies. 

Paintball Gun

The Paintball Gun is a ranged weapon used by the Painter, which he has a 10% chance of dropping upon his death. It fires a three shot burst of slow-moving, arcing projectiles which consume no mana or ammunition, though it deals ranged damage.

Its best Modifier is Unreal.

Night Vision Helmet

The Night Vision Helmet is an armor piece for the helmet slot. For the player wearing it, it increases the apparent light level provided by all light sources on the screen, similar to the Night Owl Potion. It has a 3.3% chance to be dropped by Granite Elementals and Granite Golems. It can also be purchased from the Cyborg NPC after at least one Martian Madness event has been defeated.

  • Its effect on lighting will not trigger if it is placed in the social helmet slot. It must be worn in place of a helmet armor piece.
  • Its effect doesn’t stack with Night Owl Potion and has the same strength.

Nebula Blaze

image

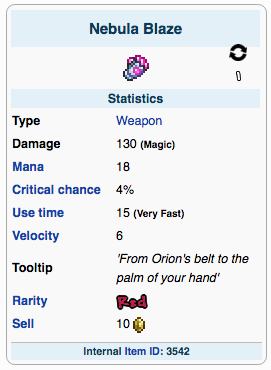
The Nebula Blaze is a Hardmode magic weapon which auto-fires pink high-velocity projectiles that home in on enemies if they are nearby, with a chance to randomly fire a larger, faster and more damaging blue projectile instead. This weapon fires inaccurately, akin to the Chain Gun and weapons like it. When selected, this weapon appears as a pink glow covering the player’s hand which leaves behind a pink particle trail as the player moves.

The Nebula Blaze does not deal any knockback.

Its best Modifier is Demonic. However, Mystic may be better for decreased mana usage.


  • There is a roughly 1/5 chance to shoot a large blue projectile which does triple damage and travels faster than the normal pink projectiles.
  • If players are killed by the blue projectile, their death message will display their cause of death being “Nebula Blaze Ex” instead of simply “Nebula Blaze”.

Nebula Arcanum

The Nebula Arcanum is a Hardmode, post-Lunatic Cultist magic weapon that fires a multicolored swirling orb when used. The orb will slowly home in on enemies and bounce off tiles, hitting three times before exploding into several smaller projectiles. All three hits do not have to be on the same target, as it will continue to home on other enemies in range if its target dies before the third hit. If the projectile does not hit three times, it will explode after 11 seconds. It also produces additional pink projectiles that orbit it and damage multiple enemies, even going through tiles to do so. 2-3 of these projectiles appear per second for the first half of the projectile’s lifetime, and disappear at the same rate as it approaches explosion.

Its best Modifier is Mythical.


  • The Nebula Arcanum can consume mana very rapidly under constant use. Be sure to have items that provide mana at the ready when using this item, such as the Mana Flower, the Band of Starpower, Mana Regeneration Potions, and Restoration Potions.
  • The lasting duration, homing properties, and orbiting projectiles make the Nebula Arcanum a very effective crowd-clearing weapon.
  • The Nebula Arcanum is capable of dealing more DPS than its other Nebula counterpart, the Nebula Blaze, but has difficulty striking fast enemies and bosses.

Nebula Armor

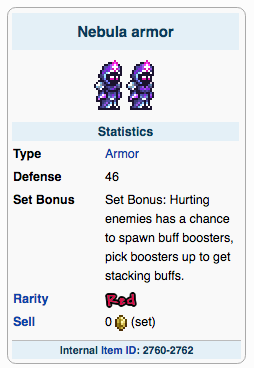
Nebula armor is a late-game Hardmode armor set that provides magic weapon boosts. It is currently the best magic set available on the Desktop version. Crafting this set requires a total of 36 Luminite Bars (144 Luminite) and 45 Nebula Fragments.

Each piece causes the player to emit a small amount of purple light. The light level is increased with every additional piece equipped.

This set grants a total buff of:

  • +60 mana
  • +26% magic damage
  • +16% magic critical chance
  • -15% mana usage
  • +10% movement speed

The Set Bonus grants a chance that special booster items will appear when striking enemies with any weapon, including minions. Each booster grants a buff that lasts 8 seconds, and causes a spark effect to float around the player. When a booster item is picked up while its buff is already in effect, it stacks with the previous buff, up to 3 times. Every 8 seconds, the buff will decrease by one level. Booster items float in the air, and have a greater pickup range than most items.

In multiplayer, any player can pick up these booster items and benefit from their buffs, even if they are not wearing Nebula armor. Additionally, picking up a booster item will grant every nearby player (within a 20-30 tile radius, approximately) one instance of the buff.

Nail Gun

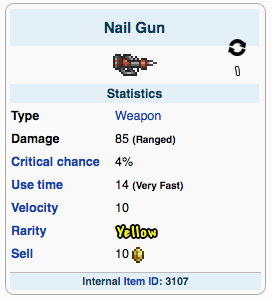
The Nail Gun is a Hardmode, post-Plantera ranged weapon which has a 4% / 6% (1/25 / 3/50) chance to drop from Nailhead during Solar Eclipses. It uses Nails as ammunition, which are sold by both the Merchant and the Arms Dealer when you have the Nail Gun in your inventory for 1 each.

When a nail hits an enemy, it sticks to it. It deals low damage on impact, but explodes after roughly 2 seconds, dealing massive damage. The nails also stick to surfaces and explode in the same manner. The explosion does not damage the shooter. Nails are unaffected by gravity until they have flown roughly 30 blocks, at which point they fly with an arc similar to that of an arrow. If used in PvP, the nails will not stick to players and will instead deal damage somewhere in between the initial damage and the explosion’s damage.

The Nail Gun deals no knockback.

Its best Modifier is Demonic or Deadly, with the latter granting slightly higher DPS at a cost of ammo consumption.

Meteor Staff

The Meteor Staff is a Hardmode magic weapon crafted by combining 20 Meteorite Bars, 10 Pixie Dust, and 10 Soul of Light at an Orichalcum Anvil or a Mythril Anvil. It summons a falling meteorite that deals 50 damage to surrounding enemies, similar to the Starfury.

Its best Modifier is Mythical.


  • The Meteor Staff’s projectiles collide with blocks, even if they spawn in them completely, making it hard to use in the Underground and Cavern layers as a weapon. However because the projectiles explode and release many glowing particles that go through blocks, it is an ideal cave exploration tool as it can light up the entire screen and reveal all caves nearby.
  • This weapon can easily kill all three Mechanical Bosses, preferably paired with the Golden Shower because of its high fire rate (though there are safer tactics for the Destroyer).
  • This weapon is indispensable for fighting the Martian Madness early on.

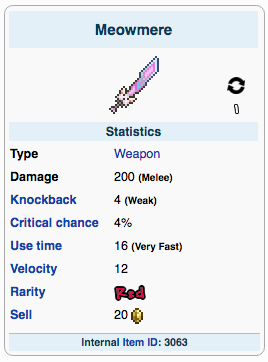
Meowmere

image

The Meowmere is a Hardmode, post-Moon Lord melee weapon. When swung, it fires a cat-shaped projectile trailed by a rainbow that consumes no mana or ammunition. The projectile is affected by gravity, and will bounce four times, piercing multiple enemies, before disappearing on the fifth hit. The Meowmere has a 11.11% (1/9) chance to be dropped by the Moon Lord. It is capable of autoswing.

Its best Modifier is Legendary.


  • The explosions produced when the projectile ricochets grow in size with each bounce.
  • This weapon can be very useful in close range situations, even when inside the Hardmode Dungeon for example, because of the tight corridors and small chambers with relatively flat geometry.
  • Projectile reflecting enemies, such as the Selenian and closed Mimics, will reflect the cat projectile. As the Meowmere has the highest base damage of any weapon in the game, and is often used at close range to strike with the blade, this can prove especially deadly to users.